


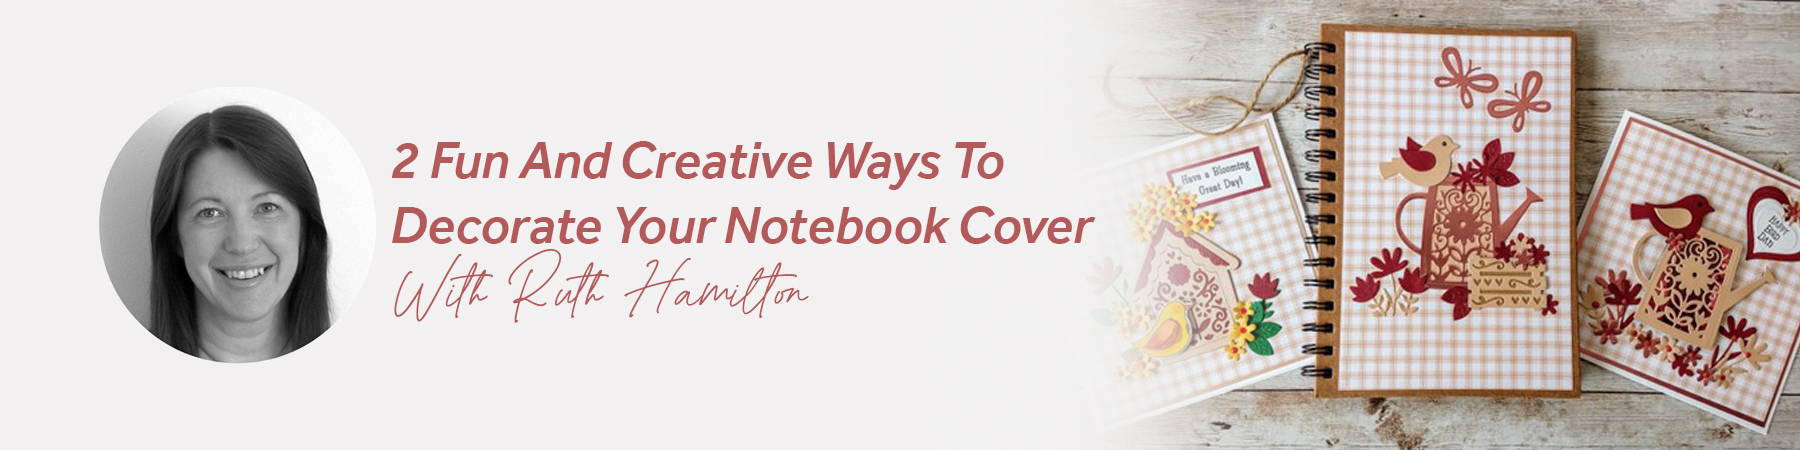
Hi, It’s Ruth on the blog today and I’m showing you how to use the fab dies and papers from the Summer Garden Kit (No. 56) to decorate an A5 notebook.
What you will need
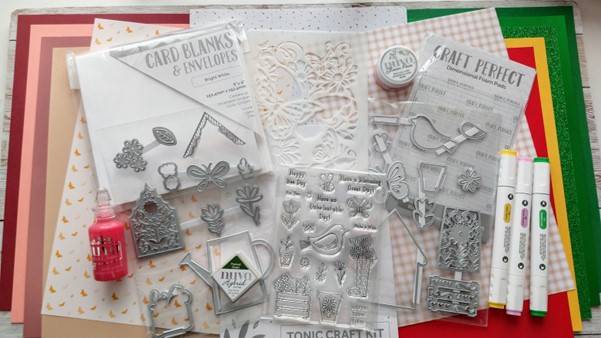
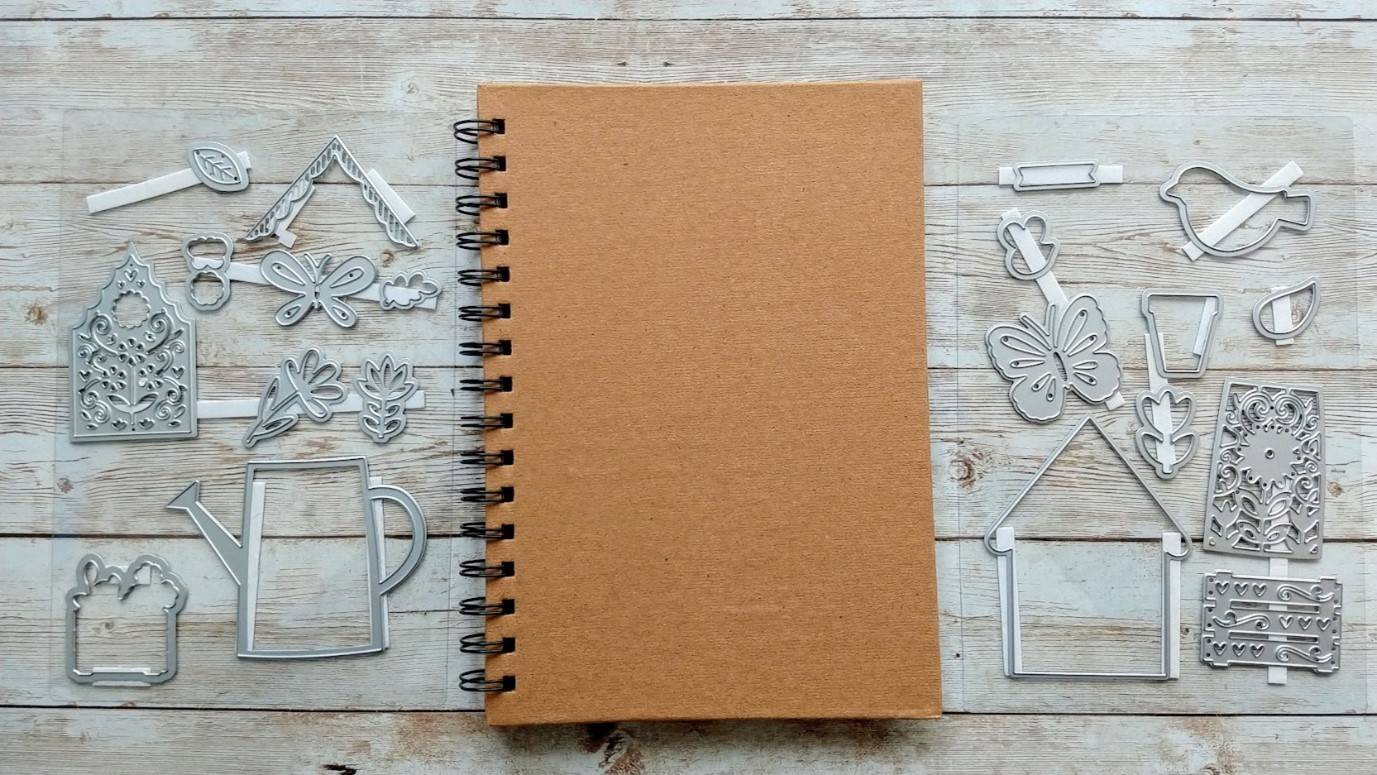
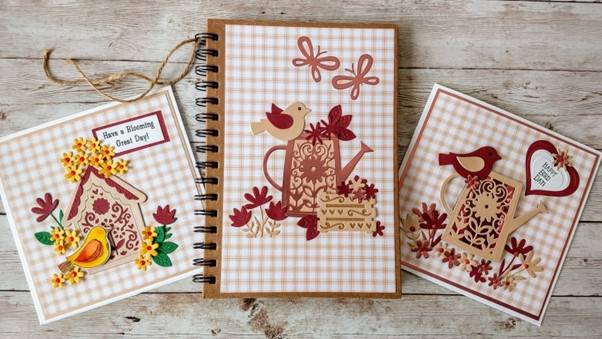
These are the contents of the kit
To decorate the front and back covers of your A5 notebook you will need the dies and papers from the kit along with Nuvo Deluxe Adhesive and some Craft Perfect Jute Twine.
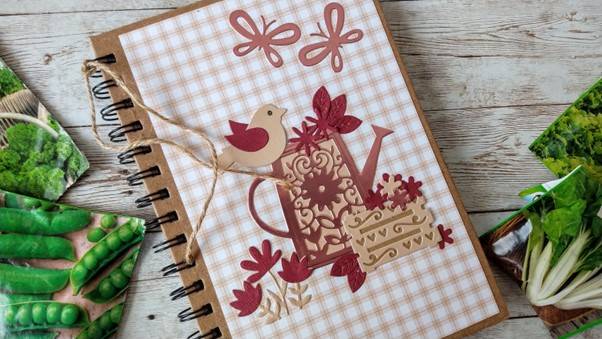
Front Cover
Step 1
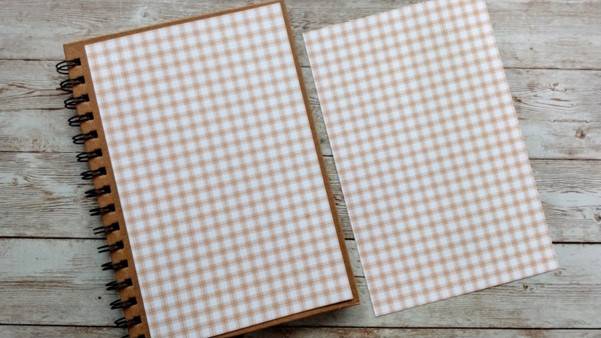
Cut 2 pieces of patterned paper measuring 13.5cm x 21cm.
NB. I highly recommend not gluing these to your notebook until you have completely decorated them and are happy with them!
Step 2
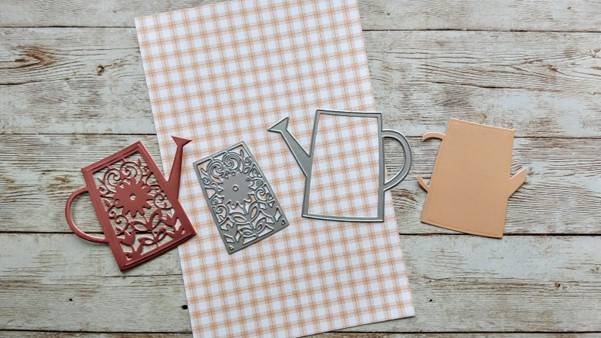
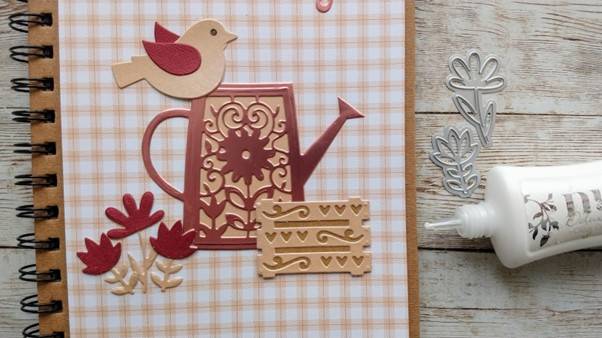
Die cut the watering can from the Baroque Rose card and then die cut the pattern into the centre with the two dies shown. Die cut another watering can from Coffee Cream card.
Step 3
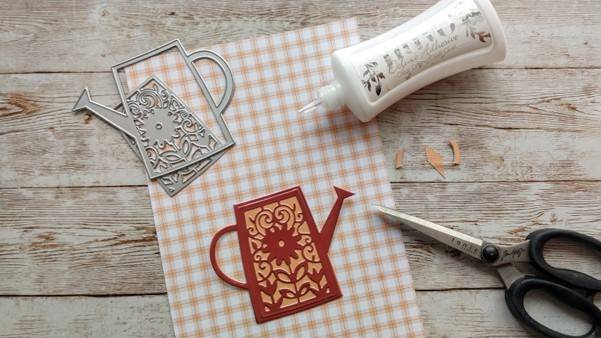
Snip off the spout and handle from the cream watering can and glue behind the patterned die cut.
Step 4
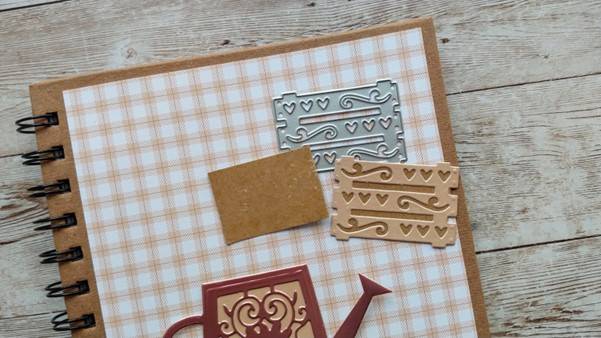
Die cut the planter and cut a rectangle of card to fit behind it. Glue together.
Step 5

Glue a small square of card to the back of the planter on the right side. This is to help keep the planter level but not add dimension.
Step 6
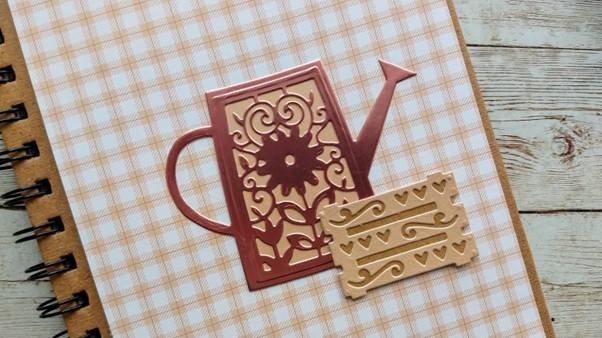
Glue the watering can to the paper and then add the planter as shown.
Step 7

Die cut the bird from Coffee Cream card and 2 wings from Maroon card. Glue the wings in place and add a black dot for the eye. Glue the bird to the top of the watering can.
Step 8
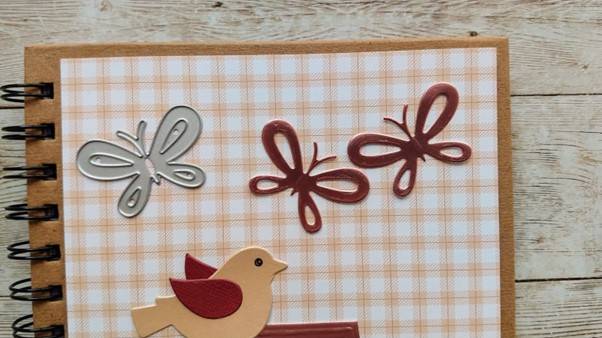
Die cut 2 Baroque Rose butterflies and glue above the bird.
Step 9
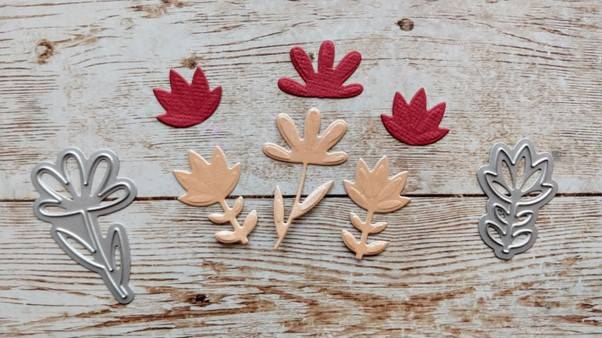
Die cut 3 flowers with stems from Coffee Cream card and the same again from Maroon card. Snip off the Maroon flowers and glue on top of the Coffee Cream flowers.
Step 10
Glue these to the bottom left of the watering can.
Step 11
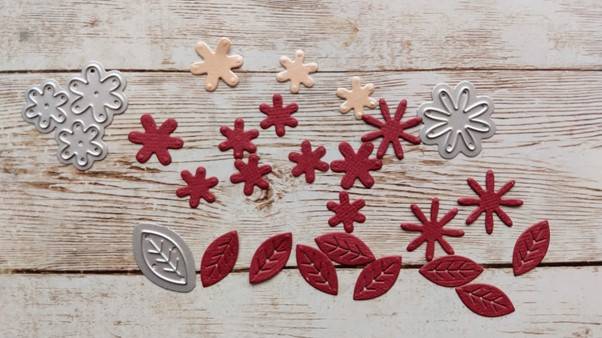
Die cut a selection of maroon and cream flowers and leaves. You can use the leftovers on the back of the notebook or another project.
Step 12
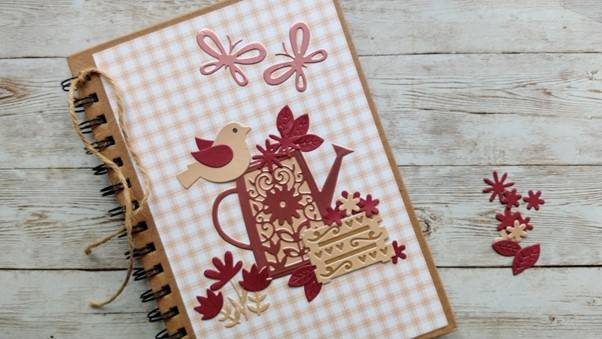
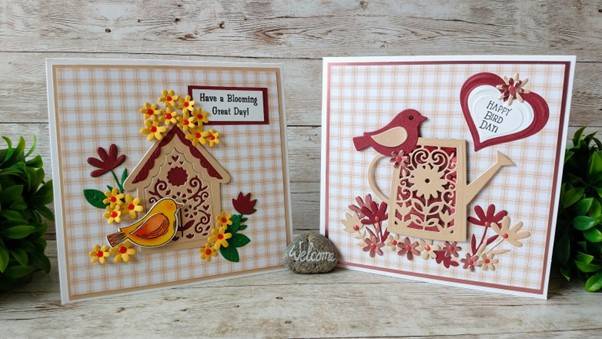
Glue the flowers and leaves to the front of the notebook, around the planter and watering can. Tie a length of jute twine to the top of the spiral binding.
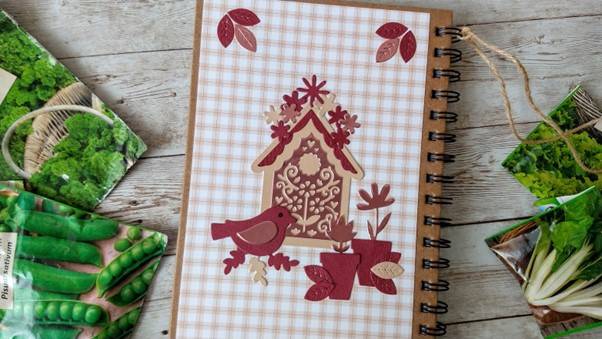
Back Cover
Step 1
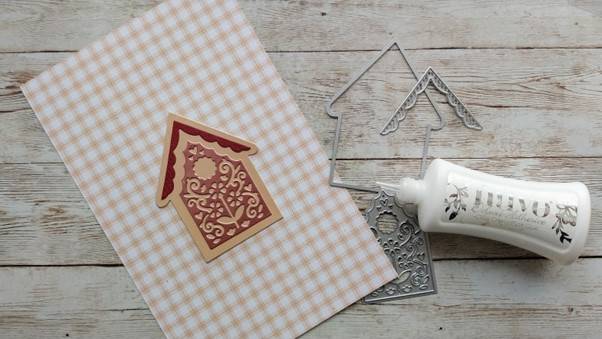
Die cut the birdhouse from Coffee Cream card and the patterned panel from Baroque Rose card. Die cut the roof part from Maroon card. Glue these in place and glue to the centre of the page.
Step 2
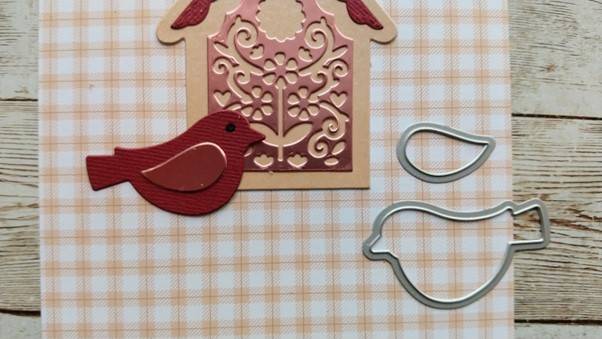
Die cut the bird from maroon card and the wing from Baroque card and glue onto the bottom left of the birdhouse. Add a black dot for the eye.
Step 3
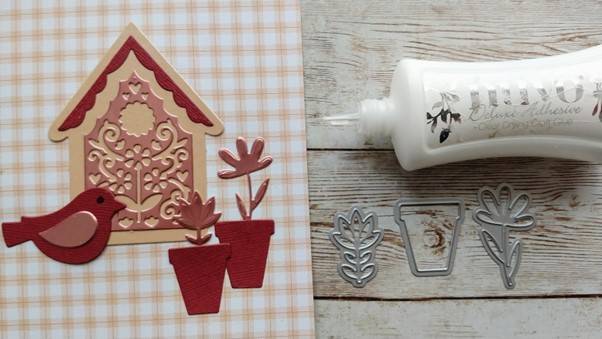
Die cut 2 flower pots and 2 flowers with stems. Glue to the right of the birdhouse.
Step 4
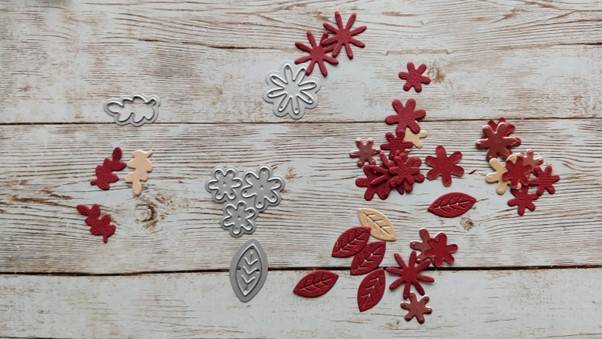
Die cut several flowers and leaves. You can use the left overs for another project.
Step 5

Glue the flowers and leaves around the birdhouse and add 3 leaves to each top corner of the notebook.
Buy The Craft Project
