


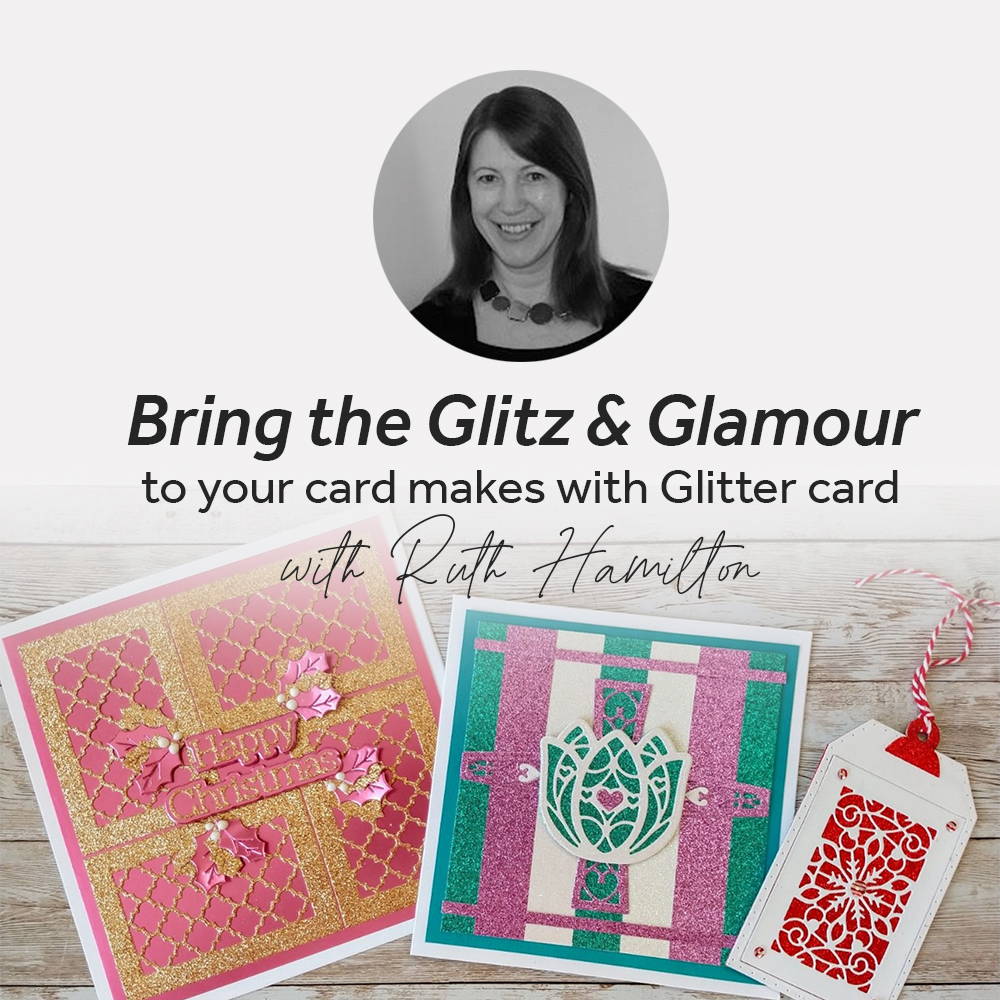
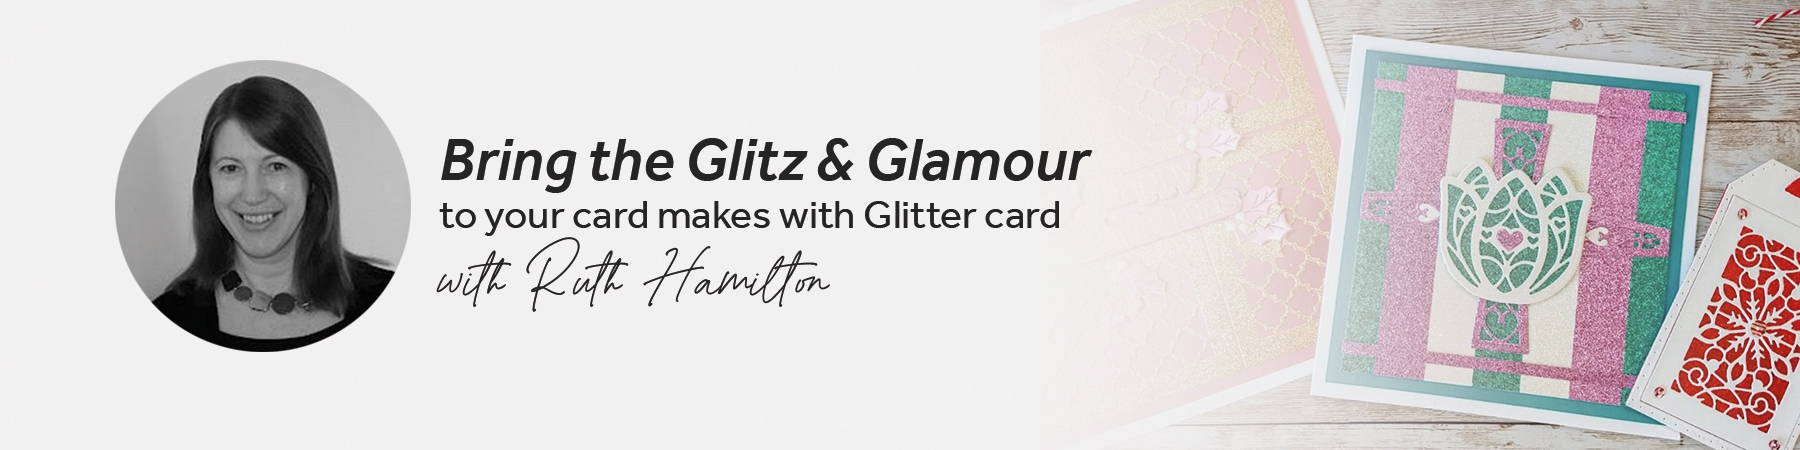
Craft Perfect Glitter Card comes in a fantastic array of different colours and is perfect for making cards as it is low shed!
When I’m using it, I tend to think of it in 3 different ways –
1. As a focal point i.e. with the glitter on the top of card with a different texture.
2. Full on glitz i.e. most of the elements are made from glitter card
3. As a background, peeping through die cut areas of card.
Whichever way you use it, it’s certain to give the wow! Factor to your cards!
I’ve made a card showing each of these ways of using Glitter Card and you can follow the steps below.
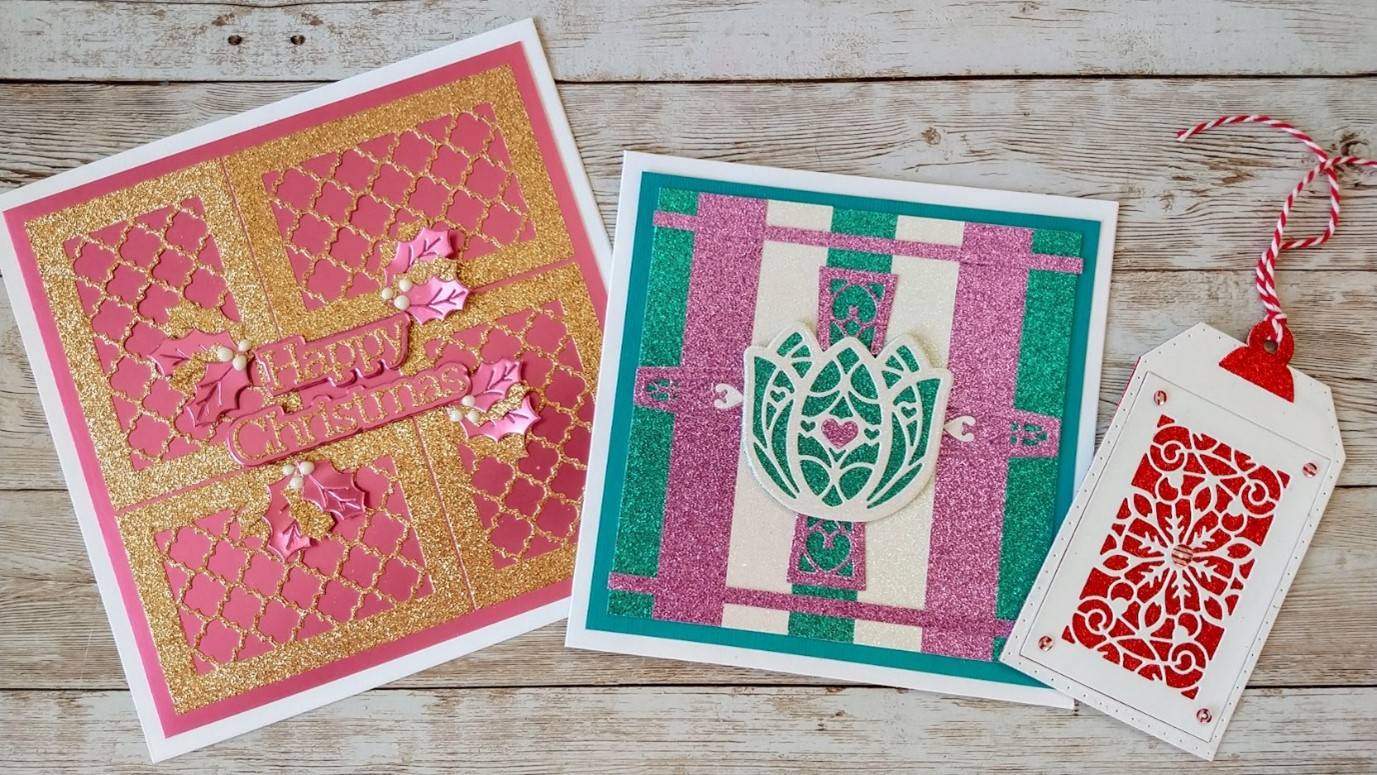
Focal Point
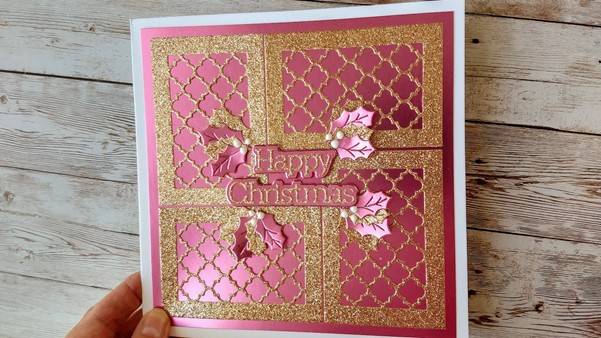
You will need the following:
- panel die from the Delightful Dresser die set
- sentiment and holly leaves from the Christmas Rose Stamp Club
- Welsh Gold Glitter Card
- Pink Chiffon Satin Effect card
- 7x7 Craft Perfect Bright White card
- White Gloss Crystal drops.
Step 1
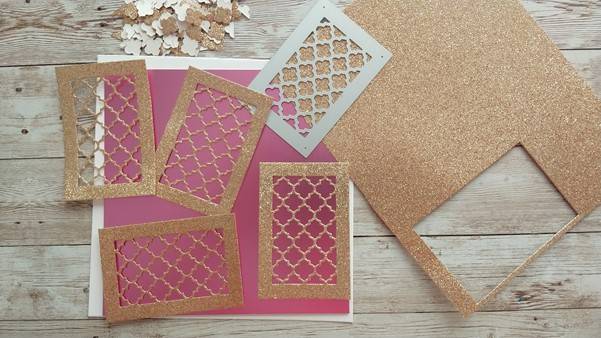
Cut a piece of Pink Chiffon card measuring 16.5 cm x 16.5cm and die cut 4 of the dresser panels from Welsh Gold Glitter Card.
Step 2
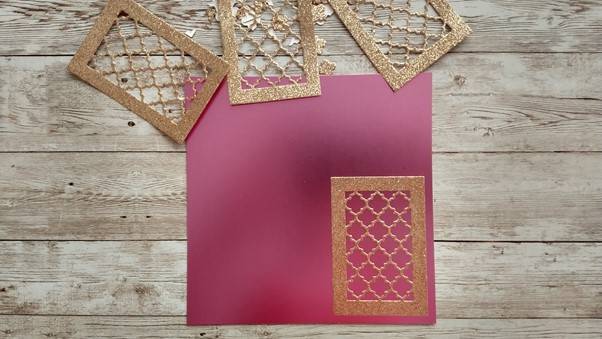
Leaving a 0.5cm gap around the outside of the Pink Chiffon card, glue the first glitter panels on vertically in the bottom right corner.
Step 3
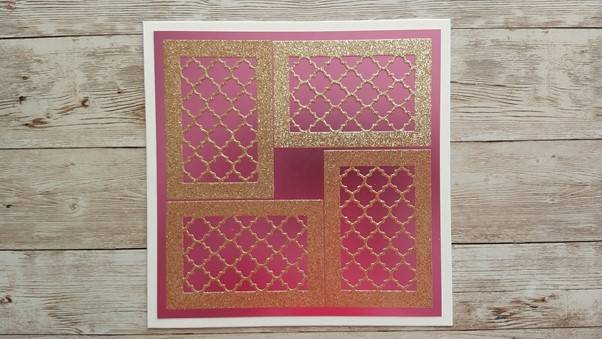
Glue the rest of the panels on as shown.
Step 4
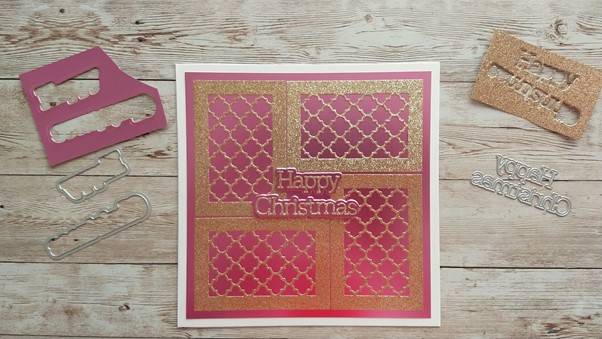
Die cut the sentiments from glitter card and glue onto Pink Chiffon backing plates. Attach to the centre of the card with 3D foam pads.
Step 5
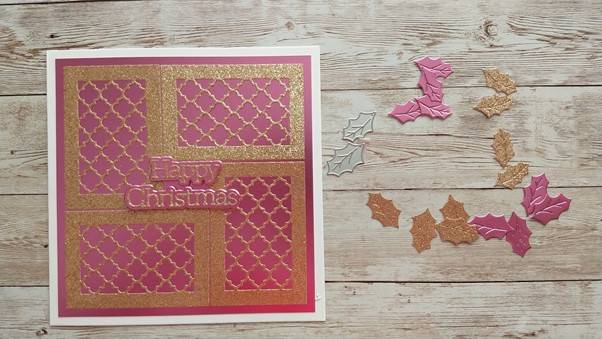
Die cut 4 small and 4 large leaves from both types of card.
Step 6

Arrange the leaves and glue around the sentiment. Add Crystal Drops.
Buy The Craft Project
Full on Glitz

You will need the following:
- Craft Perfect Ocean Blue Texture Weave card
- Craft Perfect Glitter Card – Turquoise Lake, Berry Fizz and Sugar Crystal
- Craft Perfect 6x6 Bright White card
- Designer’s Choice Serendipitous Sepal die set
- Craft Tacky Glue
- 3D foam pads
Step 1

Cut 7 strips of glitter card measuring 2cm x 13cm and glue to a 13cm x 13cm piece of plain card. Trim the glitter to fit the panel so that the outer strips are narrower. Glue to a 14cm square of Ocean Blue card and then to the card front. Cut 2 narrow strips of Berry Fizz Glitter card and glue across the top and bottom of the glitter panel.
Step 2

Die cut the plain Tulip shape from the Serendipitous Sepal set from Turquoise Lake glitter card and use the same die with the detail die to cut the pattern from Sugar Crystal card and glue together. Attach to the centre of the card with 3D foam pads and glue. Paper piece a Berry Fizz heart into the centre.
Step 3

Die cut the side panels with the dies shown from Berry Fizz Glitter card and snip in half. Glue around the centre Tulip shape, adding paper pieced Sugar Crystal hearts.
Buy The Craft Project
Background Glamour

You will need the following:
- Craft Perfect 300gsm Bright White Smooth card
- Ruby Ritz Glitter Card
- Luxury Luggage Layering Tag dies
- Panel and tag from the Delightful Dresser die set
- Craft Tacky Glue
- Candy Cane Sequins
- Chilli Red Twine
Step 1

Die cut the 7cm wide tag twice from white card and once from Ruby Ritz Glitter card. Glue the glitter card tag and one of the white tags together back to back.
Step 2

Die cut the panel form the Delightful Dresser from the remaining white tag.
Step 3

Glue the panel and the rest of the tag onto the glitter tag.
Die cut 2 of the dresser handles from Ruby Ritz card and glue to the top of the tag. Add twine. Glue sequins to the tag as shown.
Buy The Craft Project
